Durable Insulated Siding Options
Durable insulated siding options offer a compelling blend of aesthetics, energy efficiency, and longevity. Choosing the right siding significantly impacts a home’s curb appeal, energy costs, and overall lifespan. This exploration delves into the various materials, installation techniques, cost considerations, and environmental implications associated with durable insulated siding, empowering homeowners to make informed decisions for their projects.
From the initial selection of materials—such as fiber cement, vinyl, engineered wood, or metal—to the intricacies of installation and long-term maintenance, we’ll navigate the key aspects of this crucial home improvement. Understanding R-values, cost-benefit analyses, and environmental impact will equip you with the knowledge to choose the perfect siding solution for your specific needs and budget.
Types of Durable Insulated Siding
Choosing the right insulated siding can significantly impact your home’s energy efficiency, curb appeal, and longevity. This section will explore several durable options, detailing their manufacturing, lifespan, maintenance needs, and relative costs. Understanding these factors is crucial for making an informed decision that best suits your budget and long-term goals.
Fiber Cement Insulated Siding Manufacturing and Properties
Fiber cement siding is a composite material made from a mixture of cement, cellulose fibers, and other additives. The manufacturing process involves mixing these ingredients, forming them into panels or planks, and then curing them under high pressure and temperature. This process results in a durable, fire-resistant, and relatively low-maintenance siding option. The insulating properties are often achieved through a foam backing or core integrated during the manufacturing process. The final product is then often primed and ready for painting.
Vinyl Insulated Siding Manufacturing and Properties
Vinyl siding is manufactured through an extrusion process. Polyvinyl chloride (PVC) resin and other additives are melted and then forced through a die to create the desired shape and profile of the siding. Insulation is typically added as a foam backing, sometimes integrated directly during the extrusion process. The resulting panels are then cut to length and are ready for installation. Different colors and textures can be achieved through the addition of pigments and surface treatments.
Engineered Wood Insulated Siding Manufacturing and Properties
Engineered wood siding, often made from wood fibers and resins, undergoes a process involving the compression of wood fibers and binding agents under high pressure and heat. This creates a dense, stable panel that is less susceptible to warping and moisture damage than solid wood. Insulation is typically added as a separate layer, often foam-based, which is then attached to the engineered wood panel. The surface may then be treated with various finishes for protection and aesthetics.
Metal Insulated Siding Manufacturing and Properties
Metal insulated siding, commonly made from aluminum or steel, is manufactured through a series of processes including rolling, forming, and coating. The metal sheets are formed into the desired profiles, often with interlocking edges for easy installation. Insulation, frequently polyurethane or polyisocyanurate foam, is typically sandwiched between two metal sheets. The exterior is then coated with a protective layer, often paint or a powder coating, to enhance durability and aesthetics. The resulting panels are extremely durable and resistant to impact and weather damage.
Comparison of Siding Types: Lifespan, Maintenance, and Cost
The following table summarizes the lifespan, maintenance requirements, and cost considerations for each type of insulated siding:
| Material | Lifespan (Years) | Maintenance | Cost |
|---|---|---|---|
| Fiber Cement | 50+ | Periodic cleaning, occasional repainting | High |
| Vinyl | 20-30 | Occasional cleaning | Medium |
| Engineered Wood | 30-40 | Periodic cleaning, occasional staining or sealing | Medium |
| Metal | 50+ | Minimal maintenance, occasional cleaning | High |
Insulation Properties and R-Values
Understanding the insulation properties of your siding is crucial for maintaining a comfortable and energy-efficient home. The R-value is the key metric used to measure a material’s resistance to heat flow. A higher R-value indicates better insulation, meaning less heat escapes in winter and less heat enters in summer. This translates directly to lower energy bills and a more stable indoor temperature.
The R-value of insulated siding is determined by the type and thickness of the insulating material used in its construction. Different siding materials, such as vinyl, fiber cement, and engineered wood, can incorporate various insulating cores, resulting in a wide range of R-values. For instance, foam insulation, commonly used in many insulated siding systems, provides significantly higher R-values compared to traditional solid siding materials. The density and type of foam (polyisocyanurate, polyurethane, expanded polystyrene) also influence the R-value. Similarly, the thickness of the insulation layer directly impacts its thermal resistance. A thicker layer of insulation generally leads to a higher R-value.
R-Value and Material Performance
Different siding materials achieve varying insulation levels through the incorporation of insulating cores or by design features that create an air gap. For example, vinyl siding with a foam backing typically boasts a higher R-value than standard vinyl siding without insulation. Fiber cement siding, while naturally possessing some insulating properties, often requires additional insulation layers to achieve higher R-values. Engineered wood siding, depending on its composition and manufacturing process, may also offer moderate insulation, but generally less than foam-backed vinyl or insulated panels. The thermal performance of various insulated siding options can vary significantly, ranging from R-values of approximately 4 to over 10, depending on the material, thickness of the insulation layer, and overall design. This variation underscores the importance of checking the manufacturer’s specifications before making a purchase.
Benefits of High R-Value Siding
The benefits of choosing siding with a high R-value are substantial and directly impact both energy efficiency and long-term cost savings.
The following points illustrate the advantages:
- Reduced Energy Consumption: High R-value siding minimizes heat transfer, reducing the strain on your heating and cooling systems. This leads to lower energy bills throughout the year.
- Improved Indoor Comfort: Consistent indoor temperatures are maintained, reducing drafts and temperature fluctuations, leading to a more comfortable living environment.
- Lower Heating and Cooling Costs: The reduced energy consumption translates directly into significant savings on your monthly utility bills. For example, a homeowner with a 2,000 square foot house might save hundreds of dollars annually by upgrading to high R-value siding.
- Increased Home Value: Energy-efficient homes are increasingly attractive to buyers, potentially increasing your property’s resale value.
- Reduced Carbon Footprint: Lower energy consumption contributes to a smaller carbon footprint, aligning with environmentally conscious practices.
Installation Methods and Techniques
Proper installation is crucial for ensuring the longevity and effectiveness of insulated siding. The specific methods and techniques vary depending on the type of siding chosen, but all installations require careful preparation and attention to detail to achieve a high-quality, weather-resistant finish. This section details the installation process for two common types: vinyl insulated siding and fiber cement insulated siding.
Insulated Vinyl Siding Installation
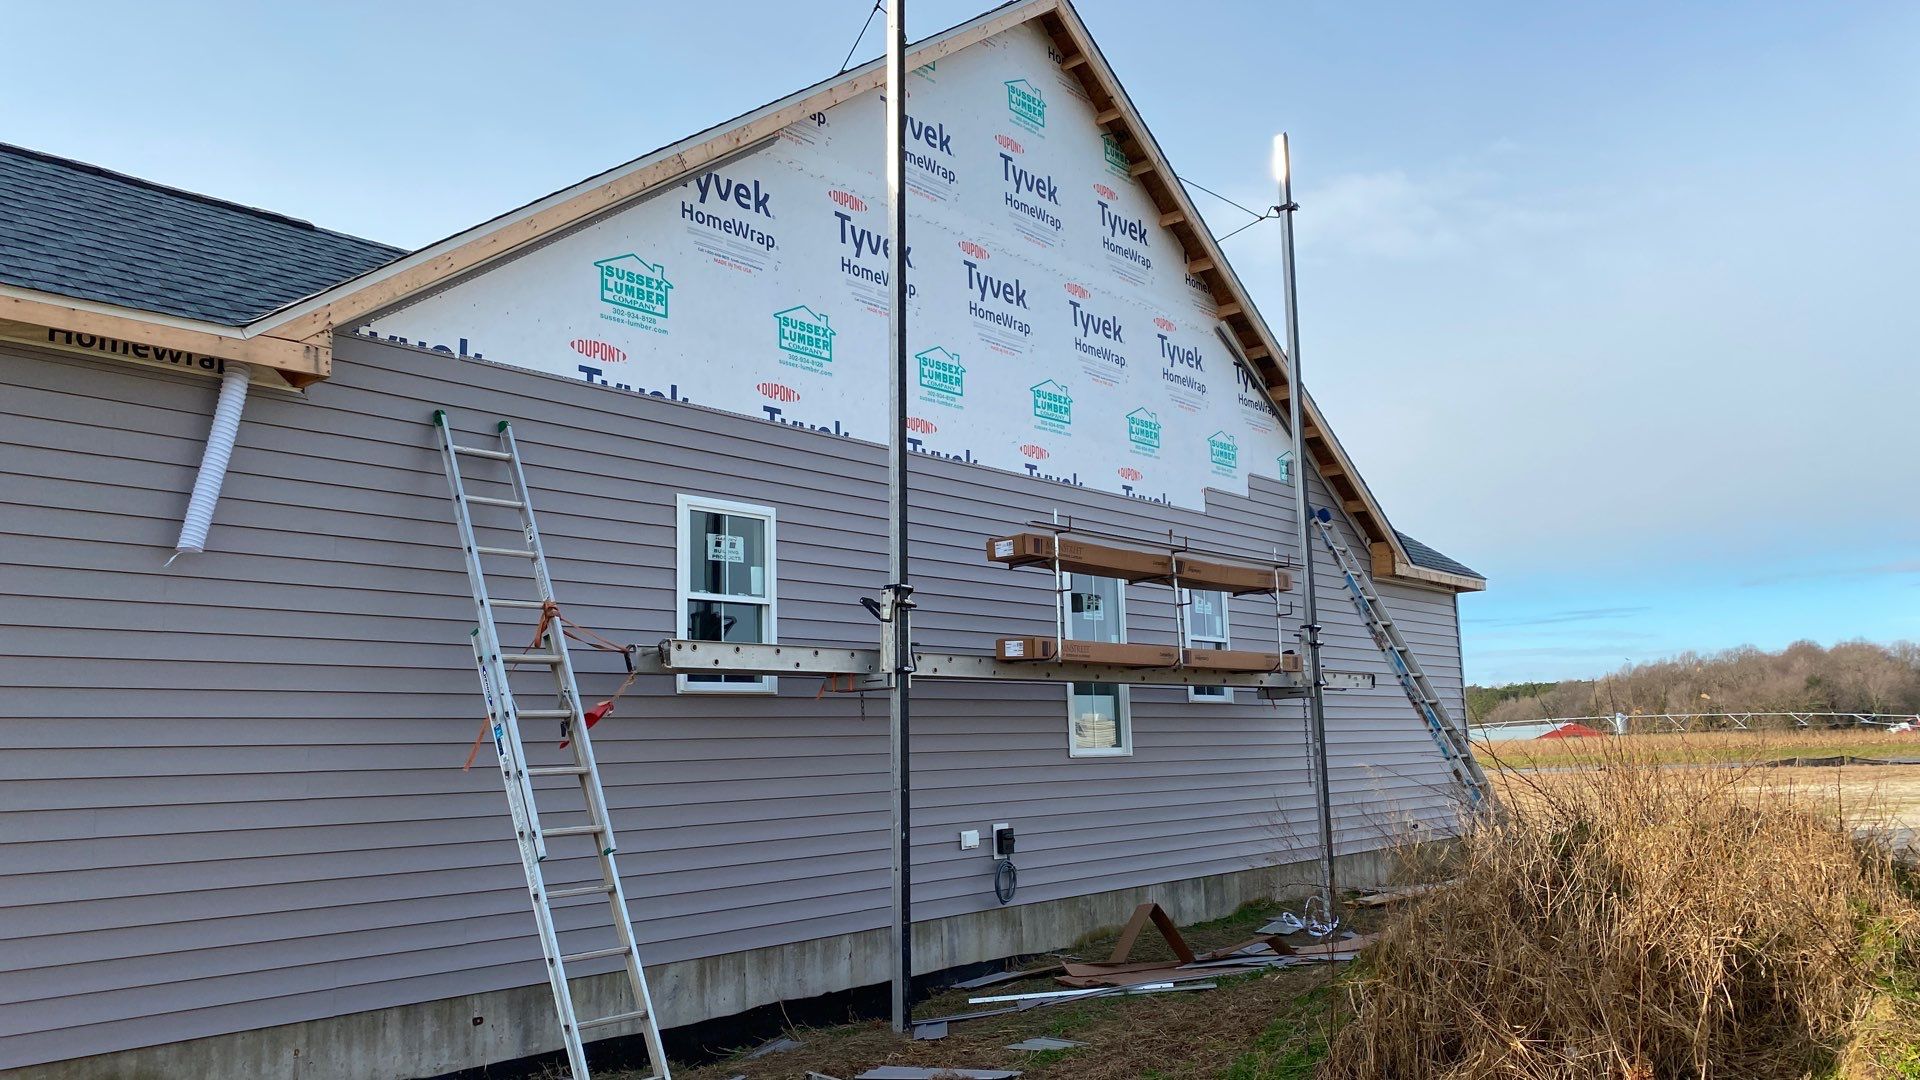
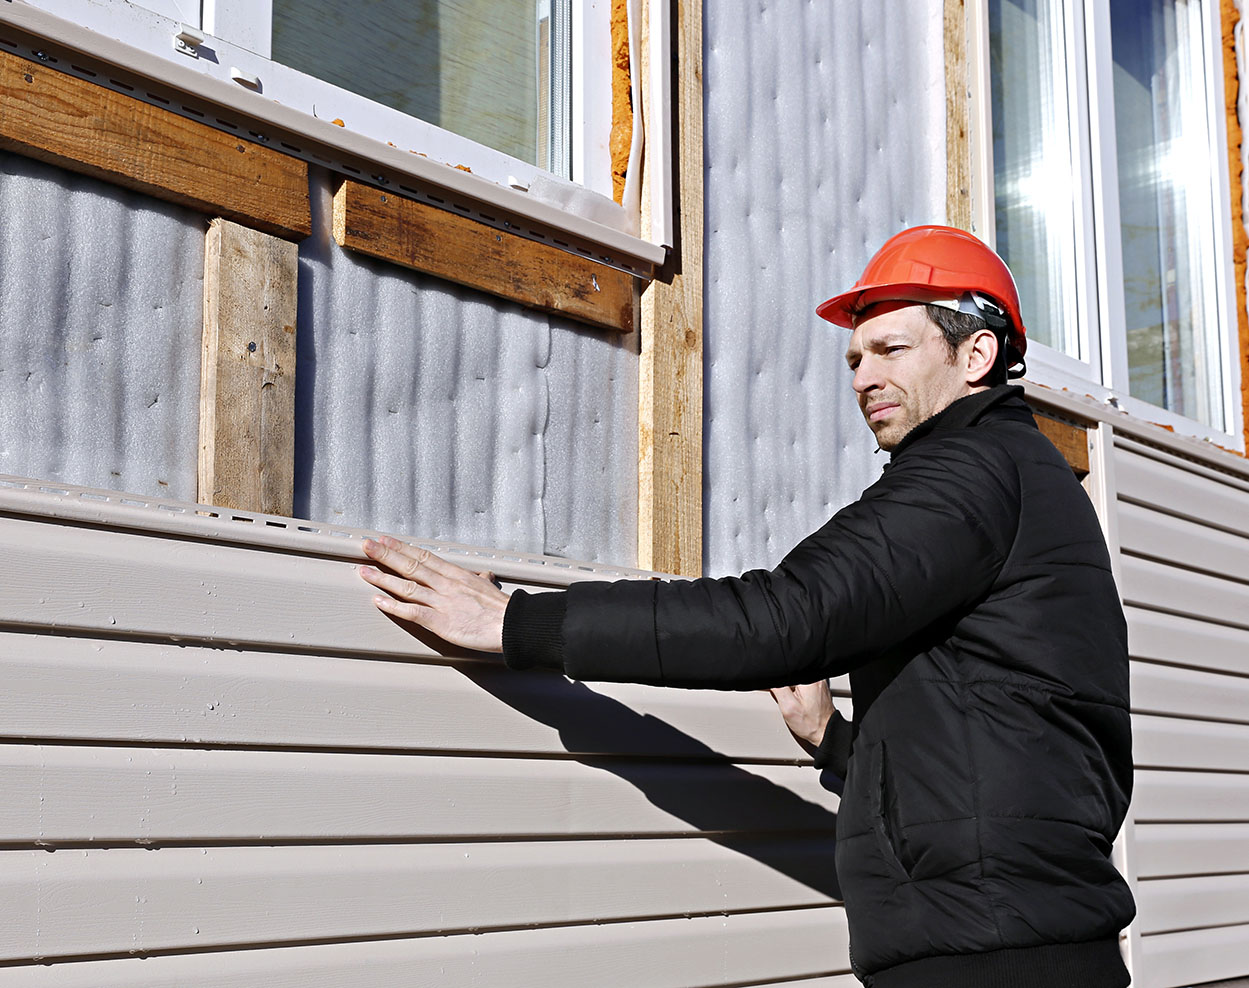
Installing insulated vinyl siding involves several key steps, from surface preparation to final finishing. Proper preparation is essential for a successful and long-lasting installation. This method focuses on a standard horizontal installation.
- Prepare the Wall Surface: First, prepare the wall surface by removing any loose debris, such as old paint chips, crumbling mortar, or loose wood. Ensure the surface is level and free of significant imperfections. Any significant irregularities should be addressed before proceeding, using appropriate patching and leveling compounds as needed. The surface should appear smooth and free of significant imperfections before applying the siding.
- Install Flashing and J-Channel: Install flashing around windows, doors, and other openings to prevent water penetration. J-channel is then installed along the bottom edge of the wall, providing a starting point for the siding panels. This creates a neat and watertight seal around these crucial areas. The flashing should overlap any existing siding and extend slightly beyond the window or door frame.
- Install Starting Pieces: Begin by installing the starting pieces at the bottom of the wall, ensuring they are level and aligned. These pieces provide a foundation for the subsequent rows of siding. These pieces should be secured with appropriate fasteners, ensuring they are tightly fitted but not over-tightened.
- Install Siding Panels: Install the siding panels, overlapping each panel by the manufacturer’s recommended amount. Each panel should be securely fastened, using nails or screws specifically designed for vinyl siding. Avoid over-tightening to prevent damage to the panels. This ensures proper alignment and overlap for weather protection. A visual inspection should be conducted after each panel is installed to ensure alignment.
- Install Trim and Accessories: Install trim pieces around windows, doors, and corners to complete the installation. This will provide a finished and professional look. These pieces should be carefully measured and cut to fit precisely. Accurate measurements are key to a seamless finish.
- Final Inspection: Conduct a thorough final inspection to ensure all panels are securely fastened, aligned correctly, and that there are no gaps or openings. This step is crucial for ensuring a watertight and durable installation. Any imperfections should be addressed before the project is considered complete.
Insulated Fiber Cement Siding Installation
Fiber cement siding, while more durable and resistant to damage, requires more specialized tools and techniques than vinyl siding. The installation process is similar in some aspects, but the material’s properties necessitate different considerations.
- Surface Preparation: Similar to vinyl siding, thorough surface preparation is vital. This includes removing loose materials, ensuring a level surface, and addressing any significant imperfections. However, due to the weight of fiber cement, any underlying structural issues should be addressed before installation begins.
- Framing and Sheathing: For larger areas or areas with significant unevenness, additional framing and sheathing may be required to create a stable and even surface for the siding. This ensures that the siding is properly supported and prevents sagging or unevenness.
- Installation of Starter Strips and J-Channel: Install starter strips and J-channel as with vinyl siding. However, because of the weight and rigidity of fiber cement, extra care must be taken to ensure proper alignment and secure fastening.
- Panel Installation: Install fiber cement panels, ensuring proper overlap and alignment. Use appropriate fasteners and spacing to allow for expansion and contraction. The weight and size of fiber cement panels often require two installers for efficient and safe installation.
- Caulking and Sealing: Thoroughly caulk and seal all seams and joints to prevent water penetration. This is especially important with fiber cement due to its porosity. High-quality caulk specifically designed for exterior applications is recommended.
- Finishing and Trim: Install trim pieces and accessories, ensuring a clean and professional finish. This step is essential for aesthetic appeal and weather protection.
Tools and Equipment for Professional Installation
Professional installation requires specialized tools and equipment. This includes measuring tapes, levels, saws (circular saw, miter saw), drills, nail guns (for vinyl), impact drivers (for fiber cement), safety glasses, work gloves, ladders, scaffolding (as needed), and various fasteners. Specific tools may vary depending on the type of siding being installed.
Potential Installation Challenges and Solutions
Potential challenges include uneven wall surfaces, improper flashing installation leading to water damage, and difficulties cutting and fitting panels around complex architectural details. Solutions include using shims to level uneven surfaces, carefully following manufacturer’s instructions for flashing, and utilizing specialized cutting tools for precise cuts. Pre-planning and meticulous measurements are key to mitigating these challenges.
Cost Considerations and Budgeting
Investing in insulated siding is a significant home improvement project, and understanding the associated costs is crucial for effective budgeting. This section will break down the average costs, influencing factors, and long-term financial benefits to help you make an informed decision. Accurate cost estimation requires considering various factors, including material choice, project size, and labor rates.
Average Costs and Influencing Factors
The overall cost of insulated siding installation varies considerably depending on several key factors. Material costs differ significantly between options like vinyl, fiber cement, and engineered wood. Labor costs are influenced by the complexity of the project (e.g., intricate architectural details, extensive repairs needed before installation), the size of the house, and regional labor rates. Additional costs might include permits, demolition of existing siding, and potential repairs to underlying sheathing. A larger, more complex project with extensive preparatory work will naturally command a higher price than a smaller, straightforward one.
Cost Breakdown by Material
The table below provides a general estimate of costs per square foot for various insulated siding materials. These are average figures and can vary based on factors such as material quality, supplier, and location. Remember to obtain multiple quotes from reputable contractors to ensure you receive accurate pricing for your specific project.
| Siding Material | Material Cost ($/sq ft) | Labor Cost ($/sq ft) | Total Estimated Cost ($/sq ft) |
|---|---|---|---|
| Vinyl | $2 – $5 | $3 – $6 | $5 – $11 |
| Fiber Cement | $6 – $12 | $5 – $8 | $11 – $20 |
| Engineered Wood | $8 – $15 | $7 – $10 | $15 – $25 |
Long-Term Cost Savings
While the initial investment in insulated siding is substantial, the long-term energy savings can significantly offset the upfront costs. Improved insulation reduces heating and cooling demands, leading to lower energy bills. For example, a homeowner with a 2,000 square foot home might see a reduction in annual energy costs of $500-$1000 or more depending on climate, existing insulation, and the R-value of the new siding. This translates to a substantial return on investment over the siding’s lifespan (typically 20-50 years depending on the material). This long-term cost savings should be a key consideration when comparing the initial investment to the potential for reduced energy consumption and associated financial benefits. A simple payback period calculation can help determine how quickly the energy savings will recoup the initial installation cost.
Maintenance and Repair
Proper maintenance and timely repairs are crucial for extending the lifespan and preserving the aesthetic appeal of your insulated siding. Neglecting these aspects can lead to costly repairs down the line and compromise the energy efficiency of your home. Regular inspections and proactive maintenance are key to avoiding significant problems.
Routine Maintenance Practices for Different Siding Types
Different insulated siding materials require slightly different maintenance approaches. Understanding these nuances will help ensure your siding remains in top condition for years to come.
- Vinyl Siding: Vinyl siding is relatively low-maintenance. Regularly inspect for cracks, loose panels, or damage from impact. Clean it annually with a mild detergent solution and a soft brush, rinsing thoroughly with water. Avoid harsh chemicals or abrasive cleaners. Minor scratches can often be buffed out with a vinyl cleaner.
- Fiber Cement Siding: Fiber cement siding is durable but requires more attention than vinyl. Inspect for cracks or damage, paying close attention to areas prone to moisture. Clean annually with a pressure washer using a low-pressure setting to avoid damaging the surface. Caulk any gaps or cracks to prevent water infiltration.
- Metal Siding (Aluminum or Steel): Metal siding is resistant to many types of damage, but it can be susceptible to dents and scratches. Regularly inspect for damage and address any issues promptly. Clean annually with a mild detergent and water solution, and consider using a metal polish to restore shine. Touch-up paint can address minor scratches and imperfections.
Common Issues and Solutions for Insulated Siding
Several issues can affect insulated siding, often related to improper installation or exposure to the elements. Early detection and prompt action are vital to preventing more extensive damage.
- Water Damage: Water intrusion can lead to mold, rot, and structural damage. Regularly inspect for signs of water damage, such as discoloration, swelling, or bubbling of the siding. Address any leaks promptly by repairing damaged flashing or caulking gaps.
- Insect Infestation: Certain insects can burrow into siding, especially wood-based options. Regular inspections and the use of appropriate insecticides can prevent infestations. Severe infestations may require professional pest control.
- Cracks and Gaps: Cracks and gaps can allow water to penetrate, compromising the insulation’s effectiveness. Repair minor cracks with appropriate caulking or patching compounds. Larger cracks or gaps may require replacement panels.
Repairing Minor Damage to Insulated Siding
Minor damage can often be repaired easily, preventing more extensive and costly repairs later.
- Assess the Damage: Carefully examine the damaged area to determine the extent of the problem. Small cracks or dents may be easily repaired, while larger damage may require panel replacement.
- Gather Supplies: Depending on the type of siding and the nature of the damage, you may need caulking, patching compound, paint, or replacement panels. Always use materials compatible with your siding type.
- Prepare the Surface: Clean the damaged area thoroughly, removing any loose debris or dirt. For cracks, slightly widen the crack to allow for proper sealant application.
- Apply Repair Material: Carefully apply caulking or patching compound, ensuring a smooth and even surface. Allow the material to dry completely before painting or finishing.
- Touch-Up Paint (if necessary): If the repair is visible, apply a touch-up paint to match the existing siding color. Use small, even strokes to blend the paint seamlessly.
Cleaning and Protecting Insulated Siding
Regular cleaning and protection are essential for maintaining the appearance and longevity of your insulated siding.
Cleaning should be done annually, using a mild detergent and water solution. A soft-bristled brush or low-pressure washer can be used to remove dirt and debris. Avoid using harsh chemicals or abrasive cleaners, which can damage the siding’s surface. For stubborn stains, consider using a specialized siding cleaner. After cleaning, rinse thoroughly with water. To protect your siding from the elements, ensure proper caulking and sealing around windows, doors, and other openings. Regular inspections for damage and prompt repairs are essential to maintain the integrity of your siding and protect your home from the elements.
Environmental Impact and Sustainability
Choosing insulated siding involves considering not only its performance characteristics but also its environmental footprint throughout its lifecycle. From manufacturing to disposal, each material carries a unique impact on the planet, influencing energy consumption, resource depletion, and waste generation. Understanding these impacts is crucial for making informed and sustainable choices.
The environmental impact of insulated siding is multifaceted, encompassing the extraction of raw materials, manufacturing processes, transportation, installation, and ultimately, disposal or recycling. Different materials have varying levels of impact across these stages. For example, fiber cement siding, while durable, requires significant energy input during manufacturing, and its disposal can pose challenges. Conversely, some vinyl sidings may contain recycled content, reducing the demand for virgin materials, but their longevity and recyclability vary considerably depending on the manufacturer and composition. This section will delve into the specifics of various materials and their associated environmental considerations.
Manufacturing Processes and Associated Emissions
The manufacturing processes of different insulated siding materials significantly influence their environmental impact. For instance, the production of vinyl siding often involves the use of fossil fuels, leading to greenhouse gas emissions. The manufacturing of fiber cement siding, while potentially more durable, also requires substantial energy input and may generate waste during the process. Conversely, some siding options, such as those incorporating recycled materials, may have a lower carbon footprint due to reduced reliance on virgin resources. Precise figures vary depending on the specific manufacturing process and the composition of the siding, but independent life-cycle assessments (LCAs) can provide valuable data for comparing the relative impacts of different products. These assessments often quantify emissions in terms of carbon dioxide equivalents (CO2e). For example, a hypothetical LCA might reveal that one type of vinyl siding generates 5 kg CO2e per square meter of siding produced, while a comparable fiber cement option might produce 8 kg CO2e per square meter.
Recycled Content and Material Sourcing
The use of recycled content in insulated siding is a key factor in its sustainability. Some manufacturers incorporate recycled materials, such as post-consumer plastic or recycled wood fibers, into their products. This reduces the demand for virgin resources and minimizes landfill waste. Furthermore, sourcing materials from sustainably managed forests or responsibly recycled sources further contributes to the environmental responsibility of the product. For instance, a siding product might be made with 20% post-consumer recycled plastic, decreasing its reliance on newly extracted petroleum. Similarly, wood-based siding sourced from certified sustainable forests ensures responsible forest management practices, mitigating deforestation and habitat loss.
Energy Efficiency and Long-Term Environmental Benefits
Energy-efficient insulated siding offers significant long-term environmental benefits by reducing a building’s energy consumption. The improved insulation provided by these materials minimizes the need for heating and cooling, leading to lower energy bills and decreased reliance on fossil fuel-based energy sources. This translates to a smaller carbon footprint over the building’s lifespan. For example, a home retrofitted with high-R-value insulated siding might see a 20% reduction in annual heating and cooling costs, resulting in a significant decrease in its overall greenhouse gas emissions. This reduction in energy consumption not only benefits the environment but also offers financial advantages to homeowners.
Environmentally Friendly Insulated Siding Choices
Several insulated siding options demonstrate superior environmental performance. Sidings made from recycled materials, such as those incorporating post-consumer plastic or reclaimed wood fibers, offer a reduced environmental impact compared to those made from entirely virgin materials. Furthermore, sidings with high insulation values contribute to energy savings and reduced greenhouse gas emissions. The choice of the most environmentally friendly option will depend on the specific product characteristics, its lifecycle assessment data, and the availability of recycled content. Independent certifications, such as those related to sustainable forestry practices or recycled content, can help consumers identify environmentally responsible choices.
Summary
Ultimately, selecting durable insulated siding involves a careful consideration of several factors. By weighing the lifespan, maintenance requirements, energy efficiency, and environmental impact of each material, you can make a confident choice that enhances your home’s value and comfort for years to come. Remember to factor in both initial costs and long-term savings when making your final decision, ensuring a balance between investment and return. This comprehensive overview provides a solid foundation for navigating the world of durable insulated siding options and making the best choice for your home.
